How to Build an Editorial QA Checklist for Outsourced Content
How to build an editorial QA checklist for outsourced content: an editorial QA checklist for outsourced content usually works best as an 8 to 12 item gate…

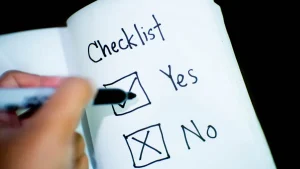
Clipboard with a handwritten checklist beside a laptop
Last updated: October 21, 2026
Quick answer: an editorial QA checklist for outsourced content usually works best as an 8 to 12 item gate that takes about 10 to 20 minutes to run before publication. It is a short, repeatable check that catches errors before publication without turning every draft into a full rewrite. It suits teams that buy articles, landing pages, or blog posts from freelancers, agencies, or content mills and need the same standard every time. It is not a style guide, and it is not a revision brief; it is the publishing check that sits after the draft is done.
What an editorial QA checklist does that a rewrite does not
An editorial QA checklist catches publish-blocking defects, not every sentence you wish had been written differently. That distinction matters because outsourced drafts often fail in predictable places: a broken internal link, missing alt text, a wrong product name, an unverified claim, or metadata that never got filled in. A checklist is the tool for those failures. A rewrite is the tool for voice, structure, and argument.
The trade-off is simple. A stricter checklist makes publication more consistent, but it does not rescue a weak brief or a thin draft. If the source material is wrong, the checklist will only expose the damage faster. That is why this method works best for teams that already have a style guide, a fact-check habit, and someone responsible for final sign-off.
Think of the checklist as a 15-minute gate, not a two-hour edit. If every article needs deep surgery, the checklist has been overloaded. Keep it focused on items a second reviewer can verify in one pass: headline accuracy, section order, citations if you use them, links, formatting, metadata, and brand terms. If you need to change argument, pacing, or angle, that belongs in the editing workflow, not in QA.
A useful checklist also creates a paper trail. If three different writers submit the same kind of mistake, the checklist shows you where the process is failing. That makes it useful for outsourced work in a way a one-off edit never is. It gives you something to standardize across 10, 20, or 100 drafts.
A generic list that says “check quality” does not help. A useful editorial QA checklist names the exact checks, the order to run them in, and the pass/fail result you expect. For outsourced work, that usually means separating editorial judgment from mechanical checks so one person can handle publication review without becoming the de facto ghostwriter.
What should be on an editorial QA checklist?

An editorial QA checklist should cover the 8 to 12 checks that block publication most often and can be judged quickly. That usually includes factual accuracy, style compliance, formatting, metadata, internal links, SEO basics, and image or asset checks if your CMS uses them.
A practical way to build it is to work from the end of the publishing process backward. Start with what breaks when the page goes live, then add what repeatedly causes rework. A checklist built from real failures is better than one copied from another team’s template.
Build the checklist from the publishing gate backward
Start with the last step and work in reverse so the checklist reflects what actually blocks publication. That approach usually finds the issues that are cheapest to fix before the article goes live.
- Confirm the article matches the assigned brief. Check topic, audience, angle, and required subpoints in the brief or task ticket. The expected result is an article that answers the assigned query, not a nearby one.
- Run a fact check on every claim that can be verified. Match names, dates, product terms, platform behavior, and any quoted policy language against the source material. The expected result is no unsupported factual statement in the final draft.
- Check the style guide rules that matter most. Look for capitalization, punctuation, terminology, preferred spellings, and banned phrases. The expected result is a draft that sounds like your publication, not the writer’s personal habits.
- Review headings and formatting. Confirm heading hierarchy, bullets, numbered lists, bold usage, and paragraph length. The expected result is content that scans cleanly in the CMS and on mobile.
- Check internal links and anchor text. Make sure links point to the right live pages, use useful anchor text, and do not repeat the same destination unnecessarily. The expected result is a navigable article with no dead ends.
- Review metadata. Verify title tag, meta description, slug, and any category or tag fields your CMS requires. The expected result is a page that can be published without last-minute cleanup.
- Check SEO essentials. Confirm the main keyword is used naturally, the search intent is still intact, and the headline is not misleading. The expected result is a page that matches the query without sounding stuffed.
- Spot-check visuals and alt text. If the draft includes images, captions, or embeds, confirm they load and the alt text describes the image plainly. The expected result is a page that is accessible and complete.
This list is enough for most teams because it separates publish-time QA from rewrite work. If you add more than about 12 items, the checklist starts to feel like a copyediting manual and people stop using it. If you need separate checklists for long-form articles, product pages, and newsletter copy, that is fine. One universal list for every format usually gets too vague to trust.
How do you build the checklist around your style guide?
You build it by turning the style guide into pass/fail items that a reviewer can check in under 30 seconds each. A style guide by itself is too broad. A QA checklist needs exact triggers: “brand name spelled this way,” “Oxford comma used,” “H2s in sentence case,” or “one space after periods only if your house style says so.”
Start with the rules that cause the most visible inconsistency. For many teams, that means 5 to 7 items, not 50. A checklist with too many style checks becomes a copyediting exam and slows publication for no gain. The point is to catch recurring errors, not to police every comma if the publication does not care about every comma.
Tie each style item to a concrete source. If your editorial handbook says product names must be capitalized in a specific way, cite that page in the checklist. If the brand prefers “email” over “e-mail,” write that exact term in the check. If you use AP Stylebook, Chicago, or an internal guide, name the rule owner so nobody has to guess which authority wins when two rules conflict.
A practical format is a three-column list: check, source, pass/fail. For example: “Headlines use title case — style guide section 2.1 — pass.” Or “No first-person plural in buyer-facing articles — style guide section 4.3 — pass.” That format cuts the time spent arguing about interpretation.
This is also where you decide what not to check. If a rule only matters in 1 out of 20 articles, do not make it a standard QA item unless it causes expensive mistakes. Keep special cases in a separate note or template field. Otherwise every review becomes a scavenger hunt.
The honest limitation here is that a checklist cannot replace editorial judgment. A writer can follow the house style and still produce a flat, unclear article. That is not a QA miss; it is a writing problem. If your team keeps trying to use the checklist to fix voice or structure, the checklist is being used for the wrong job.
What should fact checking cover in outsourced work?
Fact checking should cover every statement a reader could repeat, quote, or act on. That includes product names, feature descriptions, platform rules, process claims, dates, definitions, and any sentence that sounds specific enough to be true or false. If a line could be challenged, it belongs on the check.
The simplest rule is this: if the writer did not observe it directly, source it. For outsourced content, that usually means checking against approved sources, product documentation, a source doc, or a named expert review. If the article mentions a standard, a methodology, or a policy, the fact check should confirm the wording, not just the general idea.
Use a short source log in the checklist itself. A reviewer should be able to note what was checked and where. That can be as plain as “source: product help article dated 2025-03” or “source: style guide v3.” The goal is traceability, not academic apparatus.
Two authoritative sources worth knowing are the AP Stylebook for copy rules and the W3C Web Content Accessibility Guidelines for accessibility basics when your content includes images, headings, or embedded media. Those are not sources for every claim, but they are useful anchors when your checklist has to decide what counts as acceptable presentation.
Do not turn fact checking into a hidden rewrite. If a statement is wrong, mark it for correction. If it is unclear, mark it for revision. If it is unverifiable and not essential, remove it. A checklist that quietly rewrites claims during QA creates confusion about who owns the final wording.
The practical benefit of this section of the checklist is speed. A reviewer can spend 10 minutes verifying the highest-risk claims instead of re-reading the whole article like a novelist. That is the difference between editorial QA and line editing.
What do formatting, metadata, and internal links need to pass?
They need to be correct, complete, and easy to scan in the CMS before the article goes live. Formatting failures are often cheap to catch and annoying to publish with, because they make the page look unfinished even when the copy is fine.
Here are the checks:
- Headings follow a single hierarchy, usually H2 then H3, with no skipped levels.
- Lists use the right bullet style for the CMS.
- Paragraphs are short enough to read on a phone without turning into a wall of text.
- Bold and italics are used sparingly and consistently.
- Tables, if used, fit the layout without overflow.
- Images have captions if your publication requires them.
- Alt text describes the image in plain language, not SEO filler.
Metadata needs the same care. The title tag should reflect the article’s real focus, the meta description should not duplicate the title word for word, and the slug should be readable. If your CMS has fields for author, category, tags, or canonical URL, the checklist should include them. Leaving one of those blank often creates more cleanup than fixing a sentence.
Internal links deserve their own check because they are easy to get almost right and still be wrong. Confirm that the destination page exists, the anchor text makes sense in context, and the link supports the reader’s next step. If the page needs 3 internal links, the checklist should say 3, not “a few.” A vague instruction produces vague results. For example, a links pass can point to a related guide such as /blog/content-brief-template/, /blog/editorial-style-guide/, or /blog/content-quality-control/ when those pages genuinely support the article.
This section is where outsourced drafts often fail in small ways that add up. A writer can deliver a polished paragraph and still miss a broken slug or a link to an outdated page. The checklist is the place to catch those misses before publication, not after a reader reports them.
How do you make the checklist usable for editors, not just managers?
You make it usable by keeping it short enough to finish in one sitting and clear enough that two editors would mark the same draft the same way. A checklist that needs a meeting to interpret is not a checklist; it is a policy document.
Build it in one of three formats: a spreadsheet, a CMS comment template, or a simple checkbox list in your project tool. Any of those can work. The real test is whether a reviewer can complete it in 10 to 20 minutes for a standard article. If it takes longer, the list is probably mixing QA with deep editing.
Assign ownership by checkpoint, not by status. One person can handle factual checks, another can handle formatting and metadata, and a third can give final approval. If the team is small, one person may do all three, but the checklist should still separate the tasks. That separation makes the process easier to scale later.
Include a fail state for each item. “Pass” is not enough. A reviewer needs to know whether to correct, return, or escalate. For example: “Broken link — replace before publishing” is clearer than “check links.” The former tells someone what to do next, not just what to look at.
Keep the checklist attached to the workflow, not buried in a handbook. The people who need it are the ones touching the draft today, not the ones reading policy next quarter. If you support the broader outsourced content workflow and quality control process, this checklist becomes the publication gate that keeps standards from dissolving at the end of the pipeline.
There is a downside to tightening QA this way: reviews can feel slower at first. That is normal. The point is to reduce rework after publication, not to make the first pass feel effortless. A good checklist exposes the weak spots in the process. That can be uncomfortable, and it is still worth it.
What mistakes make an editorial QA checklist fail?
The biggest mistake is making the checklist so broad that nobody can finish it. A 40-item list sounds thorough, but it usually turns into checkbox theater. Reviewers rush, skip, or guess. The cost is predictable: bad pages go live, and the checklist loses credibility.
A second mistake is mixing rewrite instructions into QA. “Improve the intro” is not a QA item. “Intro matches the brief and uses the target term once” is. If the list asks the reviewer to fix voice, angle, and structure at the same time as link checks, it stops being a gate and becomes a cleanup job.
A third mistake is leaving out the standard for each check. “Check formatting” tells nobody what good looks like. “All H2s are sentence case and no list has more than 7 bullets” gives the reviewer a target. Specific standards make outsourced work easier to evaluate because they reduce subjective calls.
A fourth mistake is failing to update the checklist when the publication changes. If your CMS changes slug rules, your link policy changes, or your style guide moves from AP to an internal hybrid, the checklist has to change too. A stale checklist can be worse than none because it gives false confidence.
The editorial QA checklist is boring in the right way when it is quick, repeatable, and precise. If it feels creative, it is probably doing too much.
Key Takeaways
- A QA checklist is a publication gate, not a substitute for editing or rewriting.
- The items that matter most are the ones that fail often and can be checked fast.
- Style rules, fact checks, metadata, formatting, and internal links belong on an editorial QA checklist for outsourced content.
Drafted with AI; not yet reviewed by a person.